Creating Personal Agents
Creating a personal agent in Galene.AI involves three main steps: configuring the agent's identity and behavior, adding static knowledge sources, and connecting enterprise data. This guide provides an overview of the agent creation process.
Getting Started
To create a new agent, follow these steps:
Access Your Agents Page
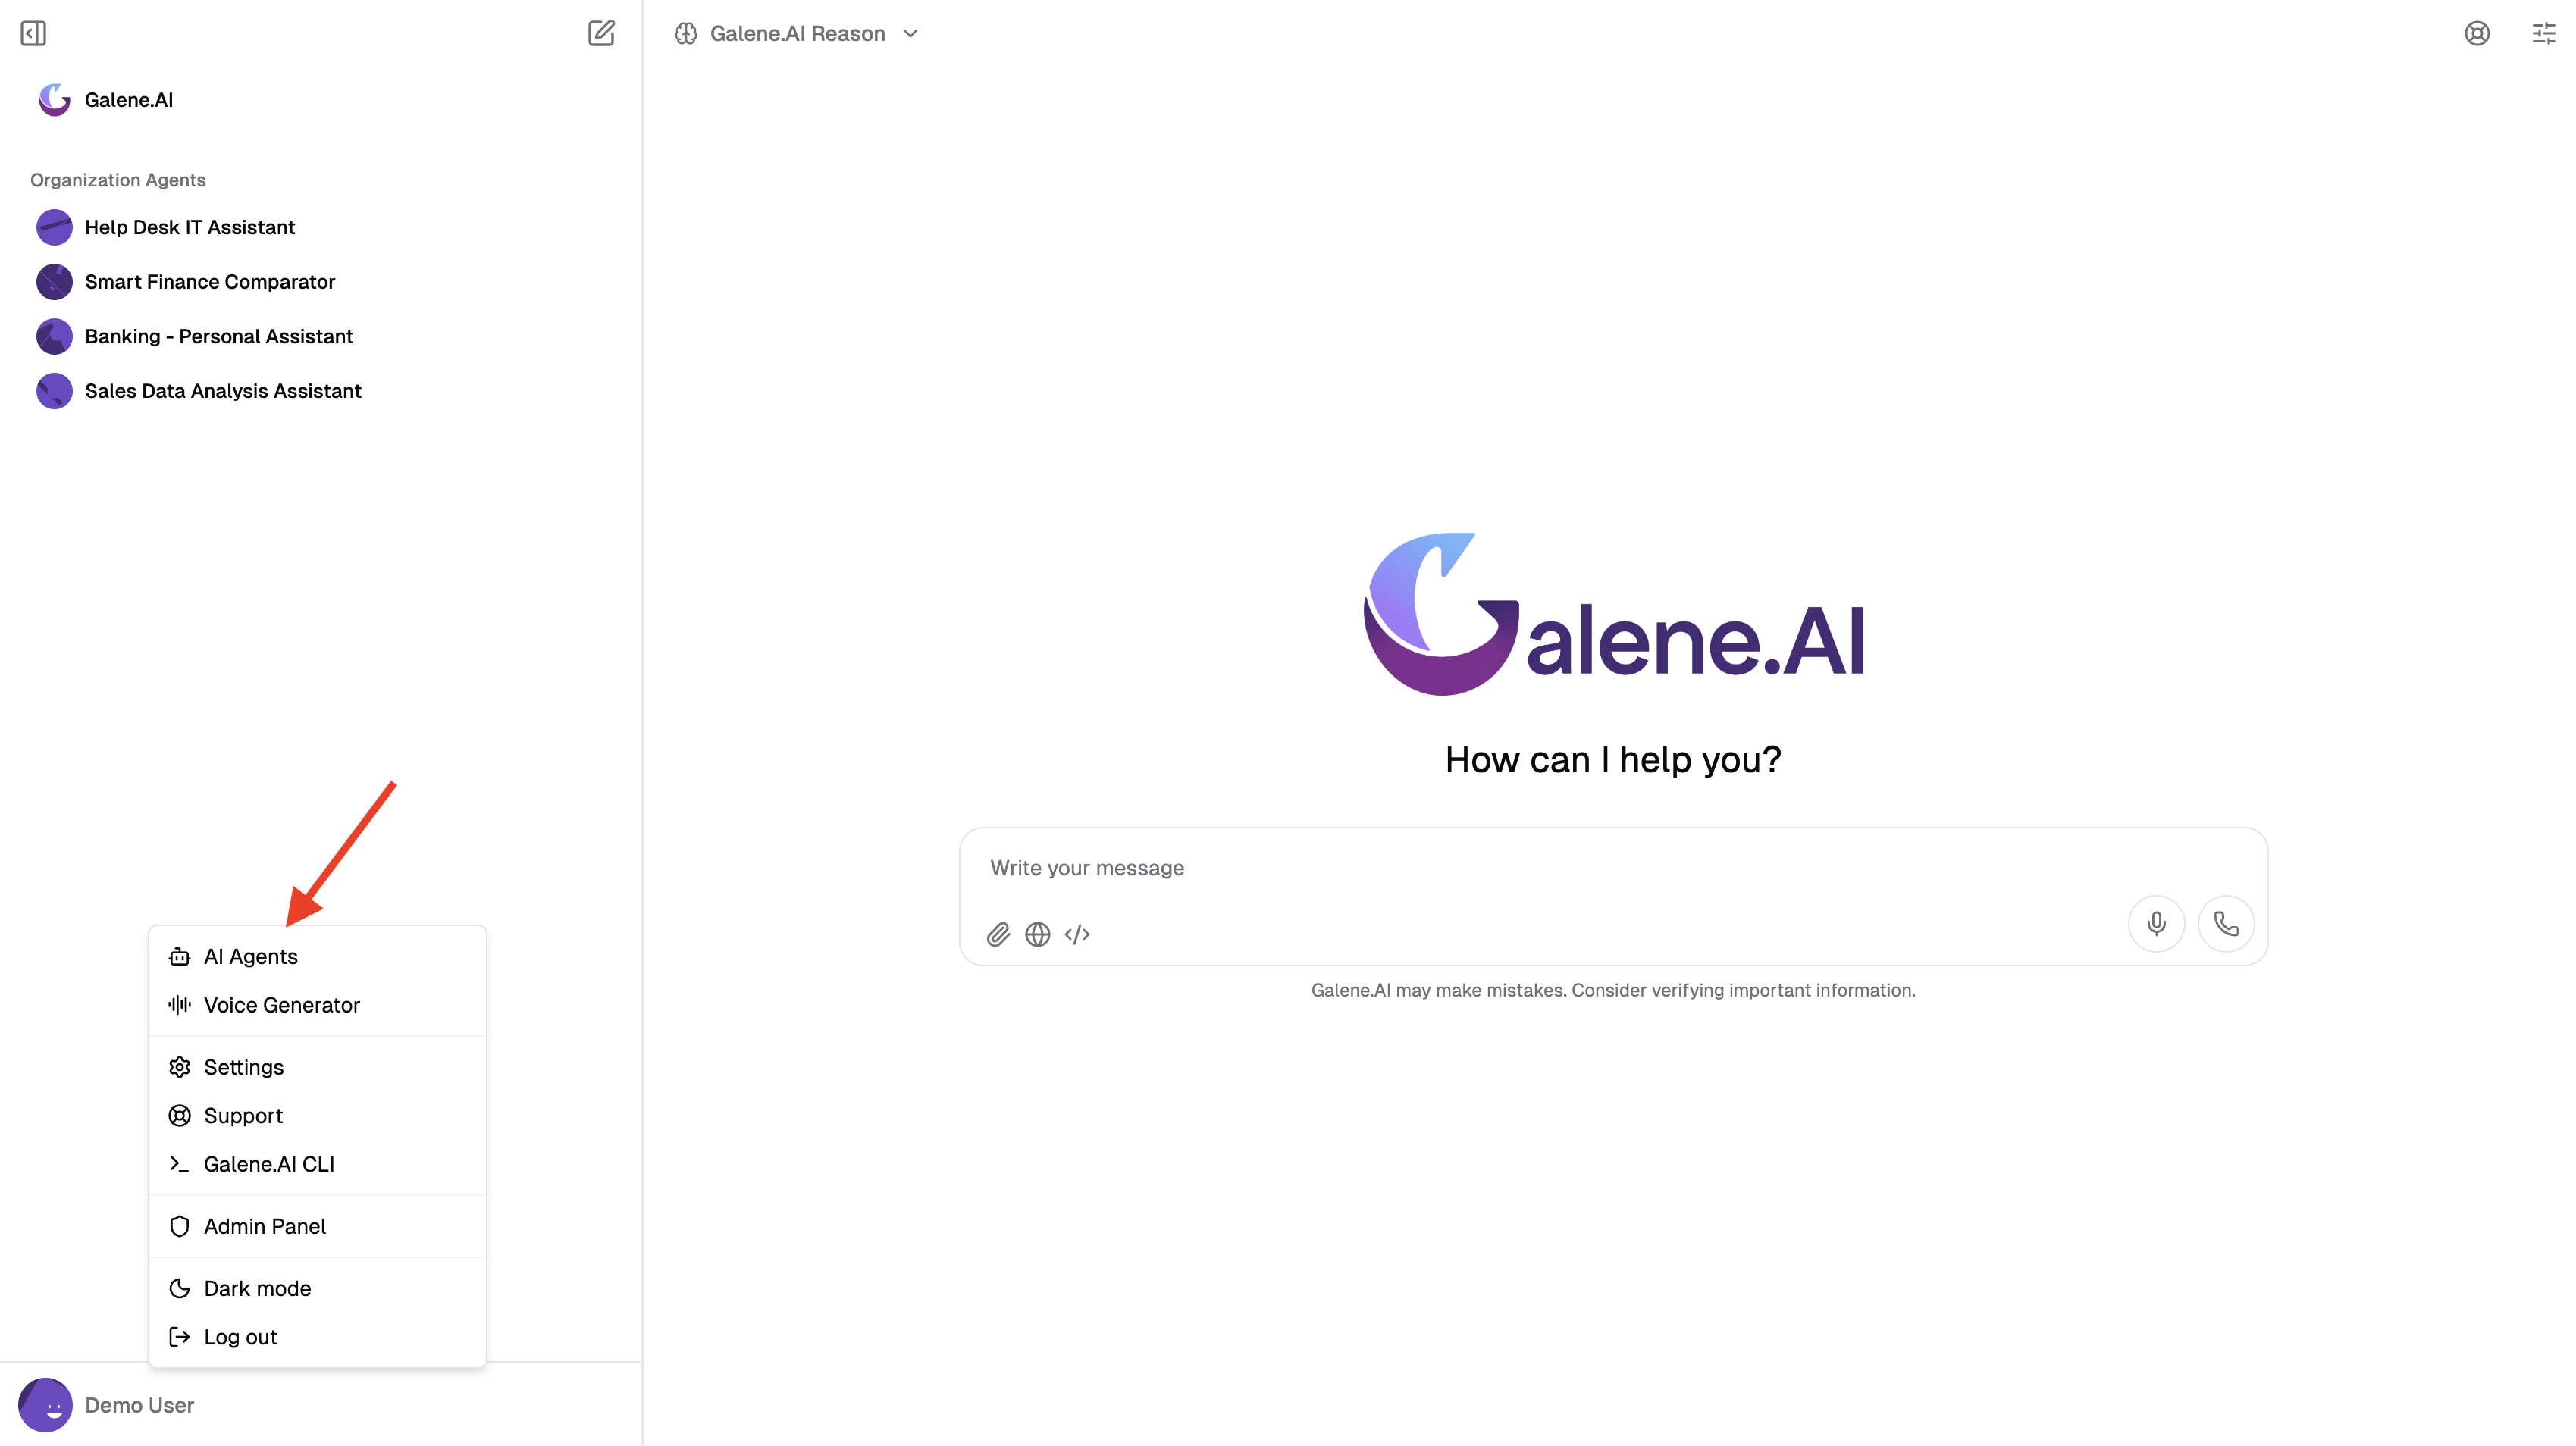
Click on your profile icon or profile image in the top-right corner of the homepage, then select "AI Agents" from the menu.
Open Agent Creation
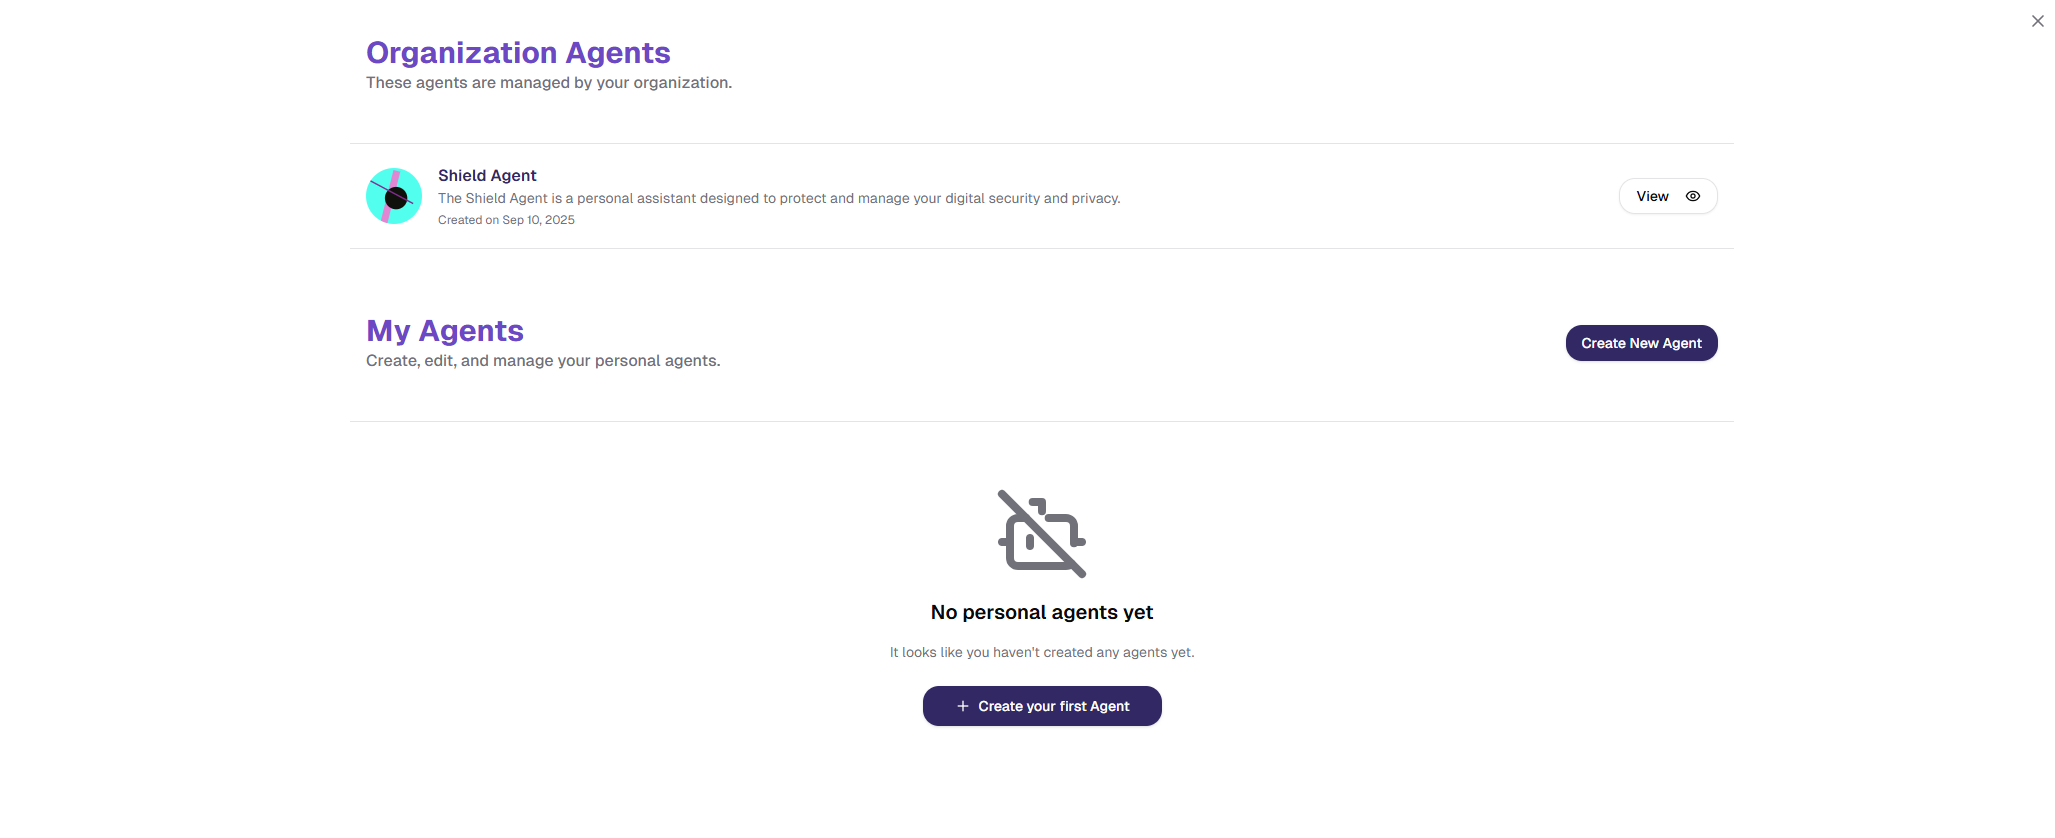
You'll see your "My Agents" page listing all your personal agents. Click the "Create New Agent" button to start creating a new agent.
After clicking "Create New Agent", the agent configuration page will appear. Now you'll set up your agent through three key steps:
Step 1: Agent Configuration
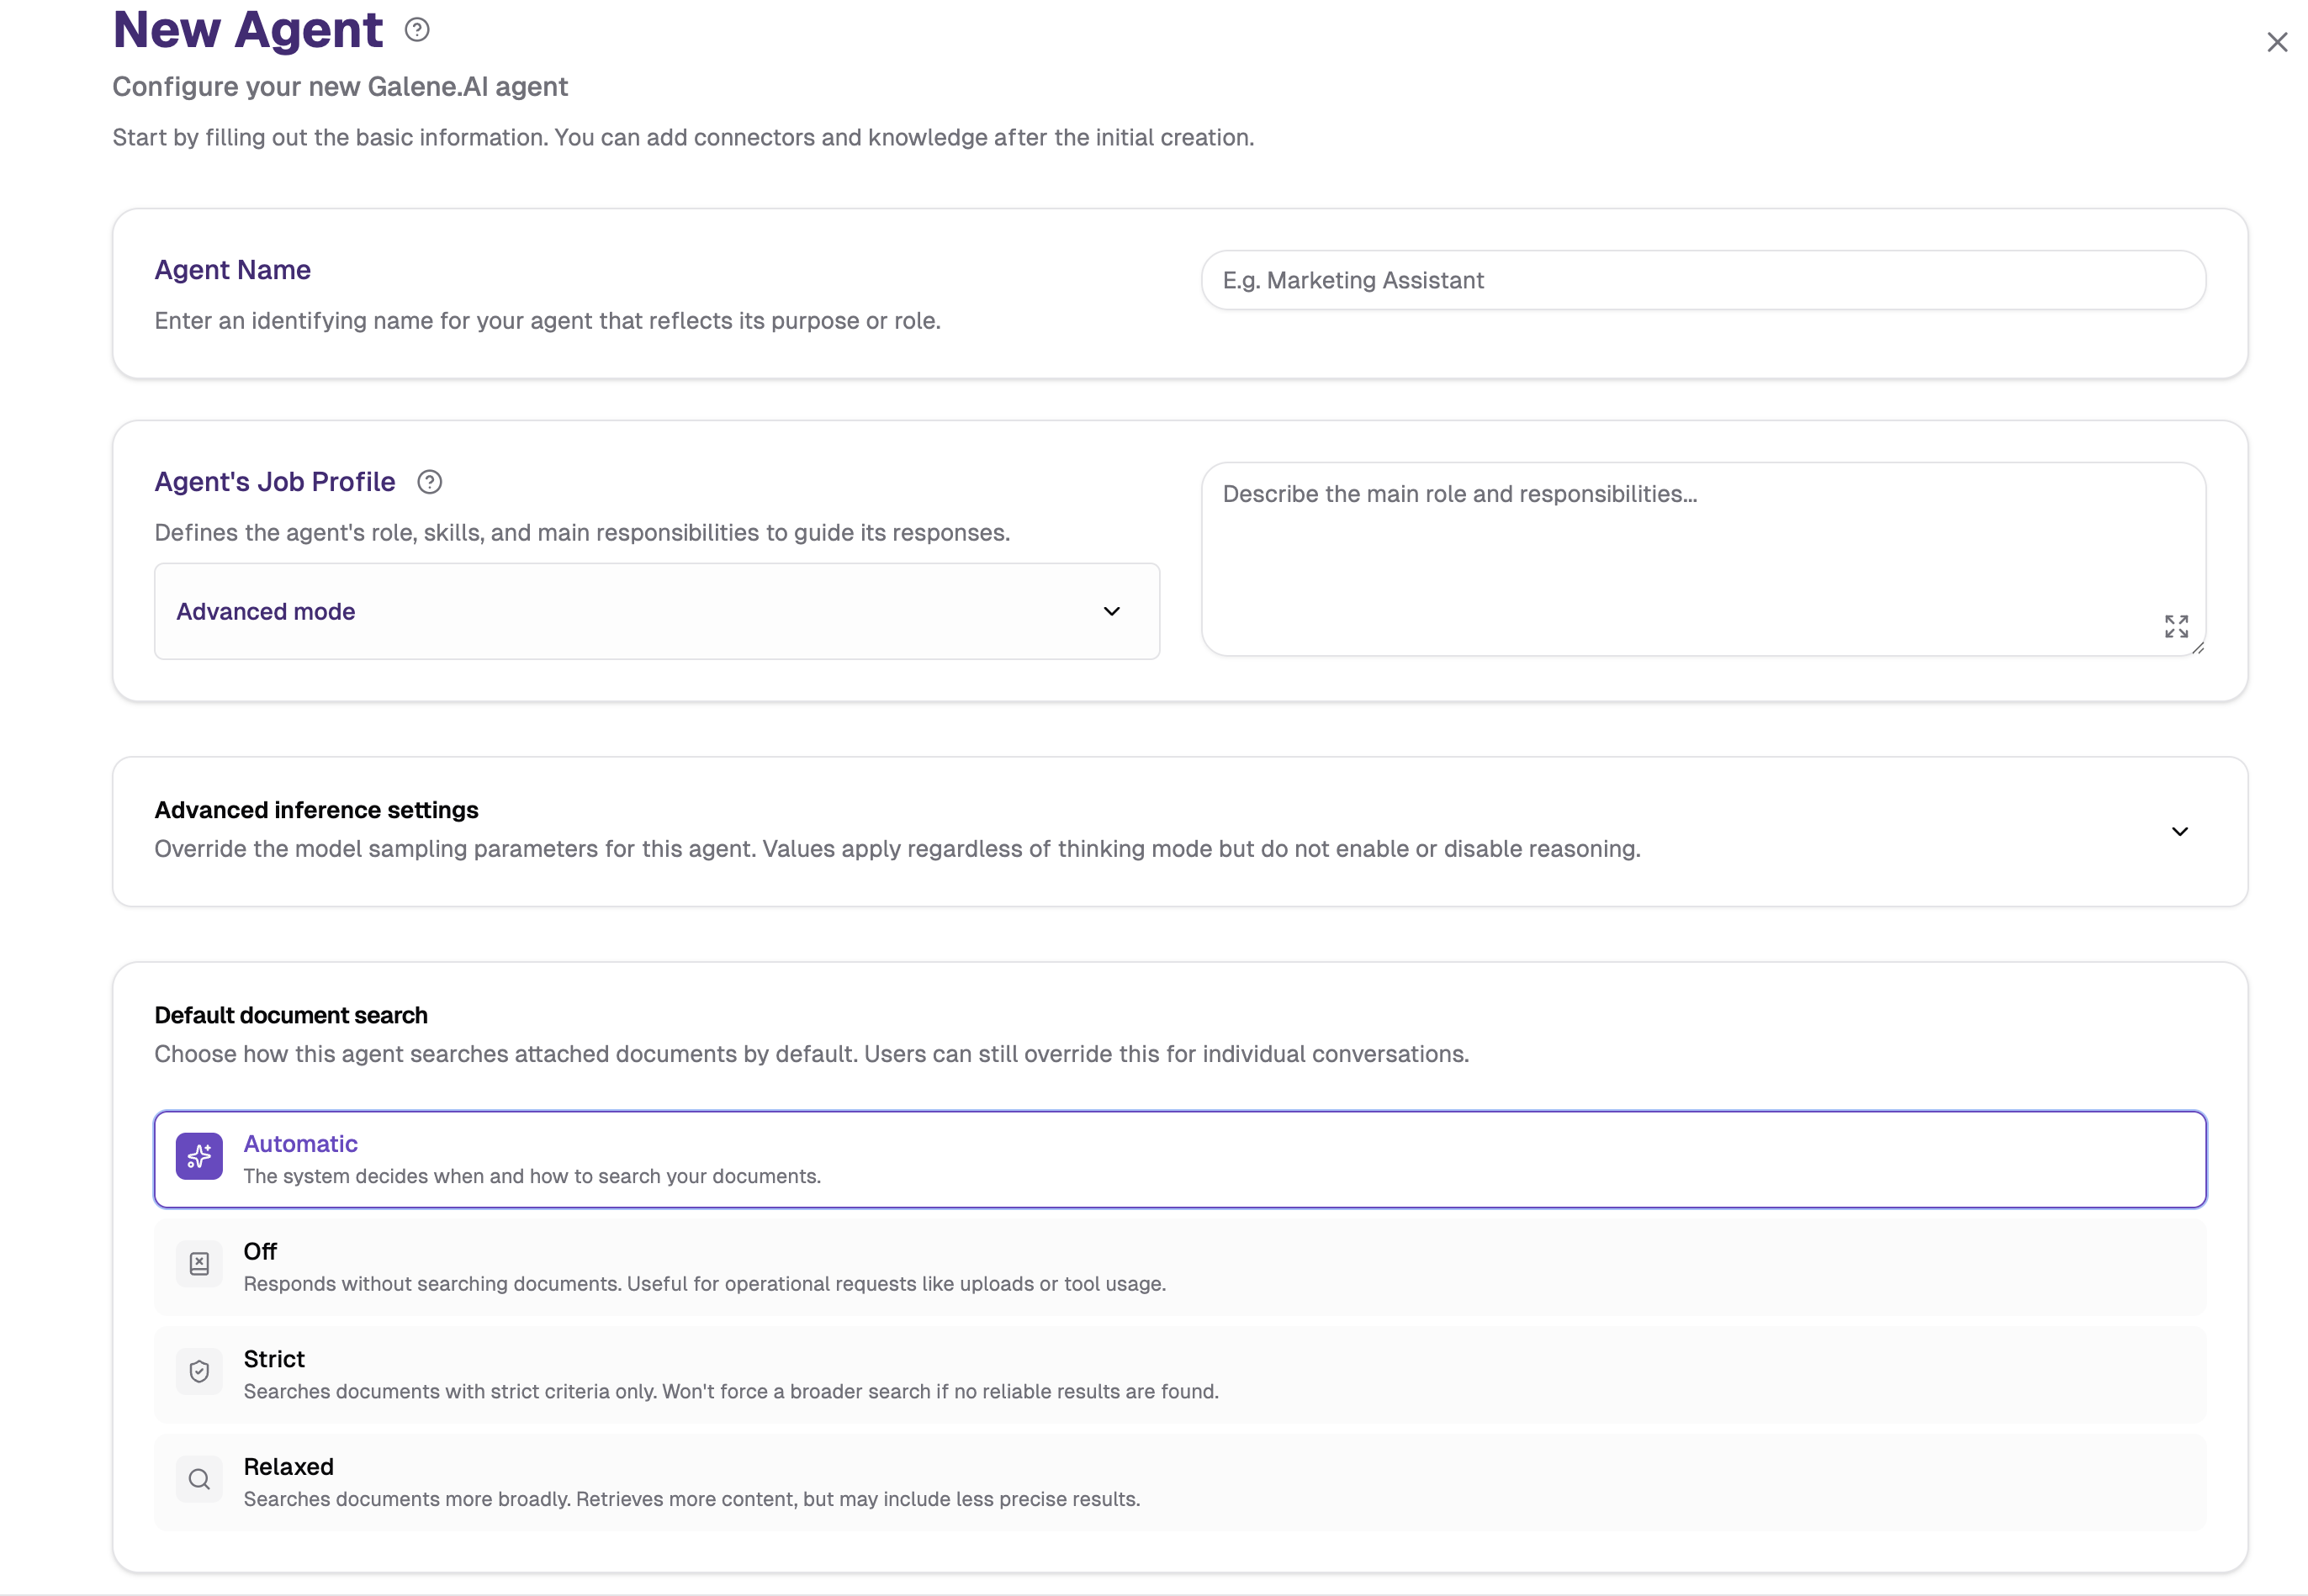
Agent configuration defines who your agent is and how it behaves. This includes:
Agent Naming: Choose a descriptive name that clearly reflects the agent's purpose and function.
- Examples: "Marketing Content Creator", "Customer Support Specialist", "Financial Data Analyst"
Job Profile: The most critical element—this is like writing onboarding instructions for a new team member. Define your agent's:
- Role and responsibilities
- Communication style and tone
- Key rules and guardrails
- Domain expertise and context
Advanced Mode: By default, the platform automatically rewrites the Job Profile to optimize clarity. If you want your prompt used exactly as written, enable Advanced Mode from the dropdown inside the Job Profile section. Note that enabling Advanced Mode will clear the current Job Profile—an alert pop-up will appear when you activate it, giving you the option to save the current content before it is lost.
Advanced Inference Settings (Optional): Fine-tune how the underlying model generates text by overriding its default sampling parameters—temperature, top-p, top-k, repetition penalty, and presence penalty. Leave it off to use the platform's optimized defaults, or enable Override platform sampling parameters to set custom values for this agent only. For a detailed explanation of each parameter, see Agent Configuration > Advanced Inference Settings.
Default Document Search: Choose how this agent searches attached documents by default. Users can still override this for individual conversations. For more details, see the Document Search Mode guide.
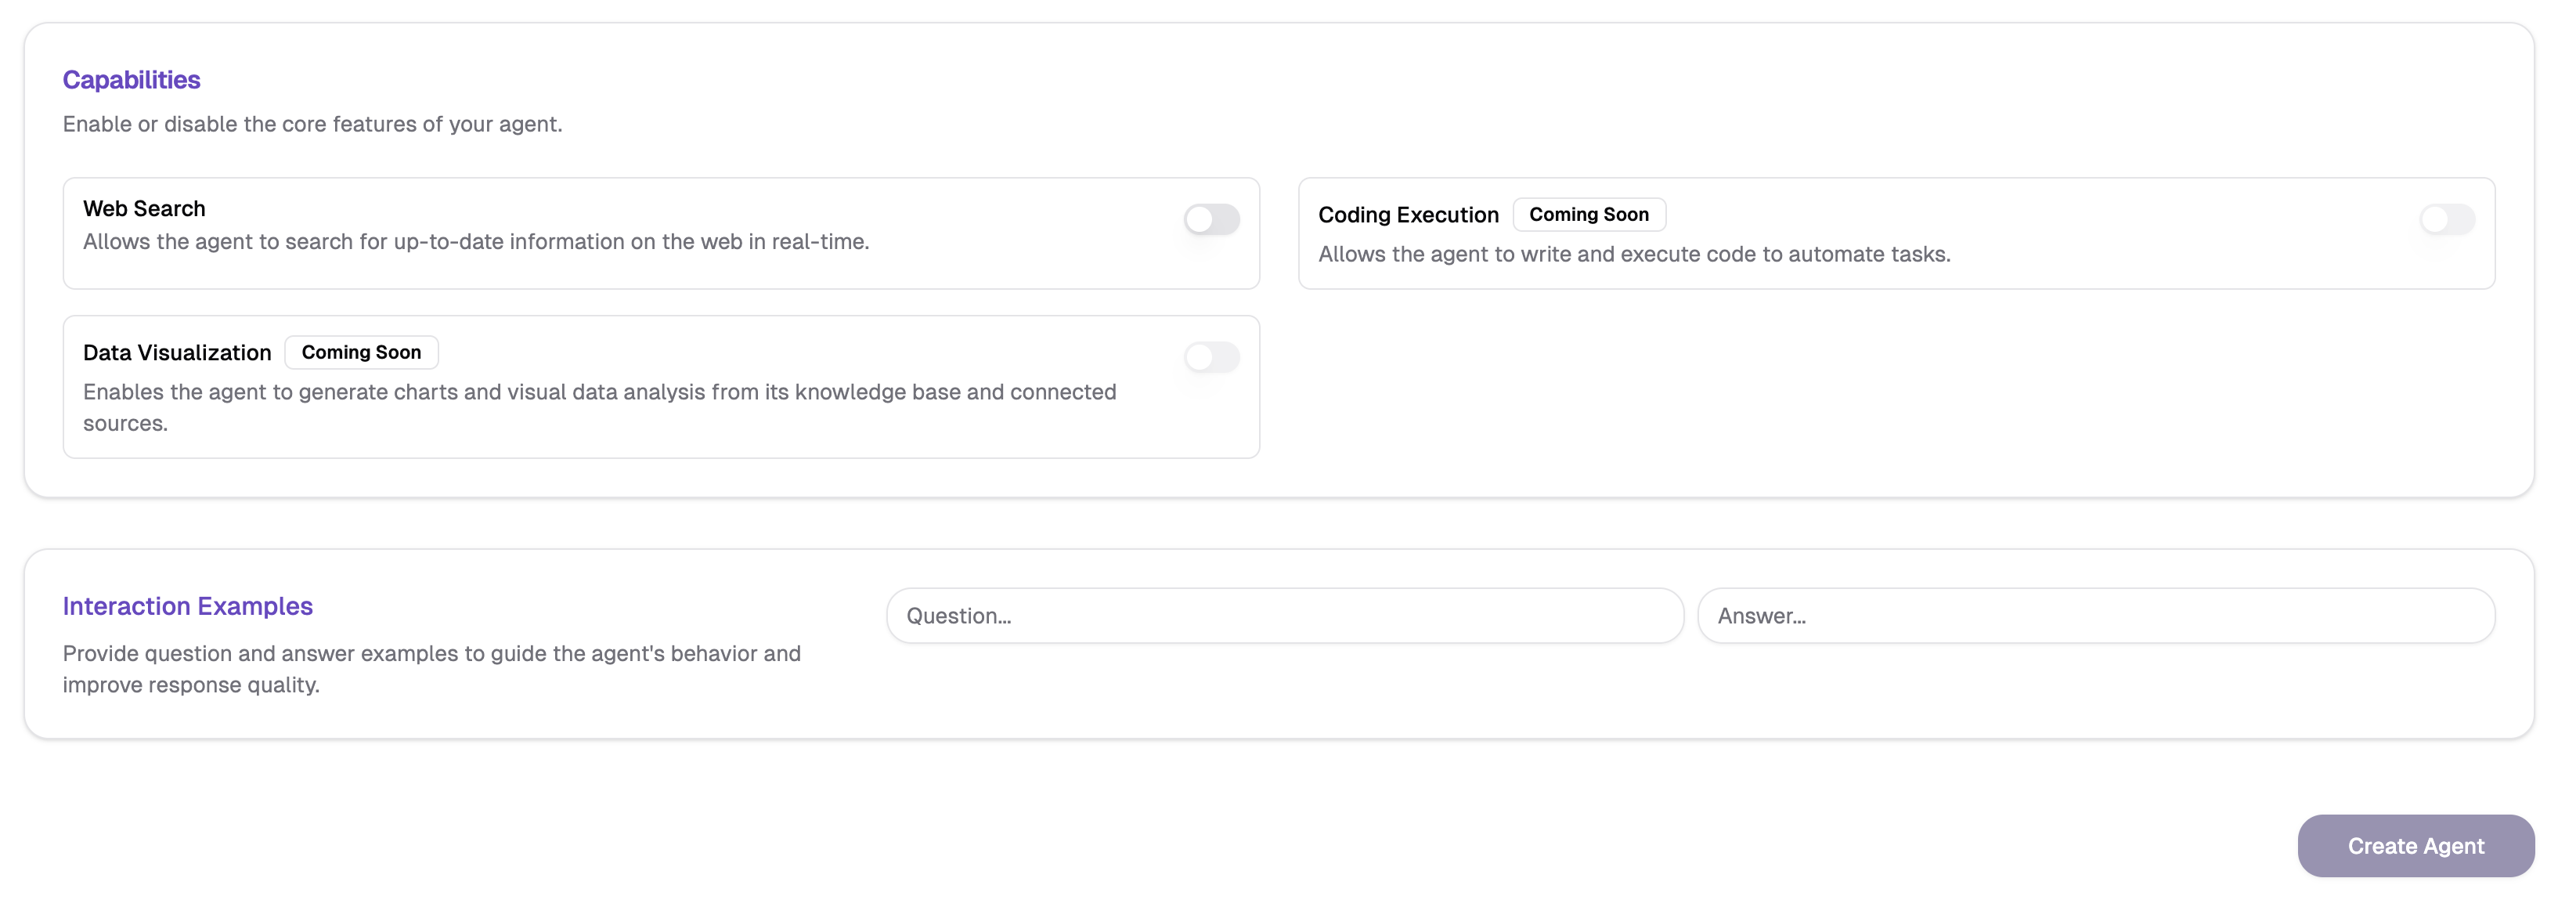 Core Capabilities: Enable optional features like web search to enhance your agent's functionality.
Interaction Examples (Optional): Provide sample Q&A pairs to fine-tune response style and behavior patterns.
Think of the Job Profile as the "personality and expertise" of your agent. The platform handles the technical details automatically—you focus on defining the human context: what the agent should do, how it should communicate, and what its boundaries are.
→ For detailed guidance on all configuration options, see Agent Configuration
Step 2: Static Knowledge Sources
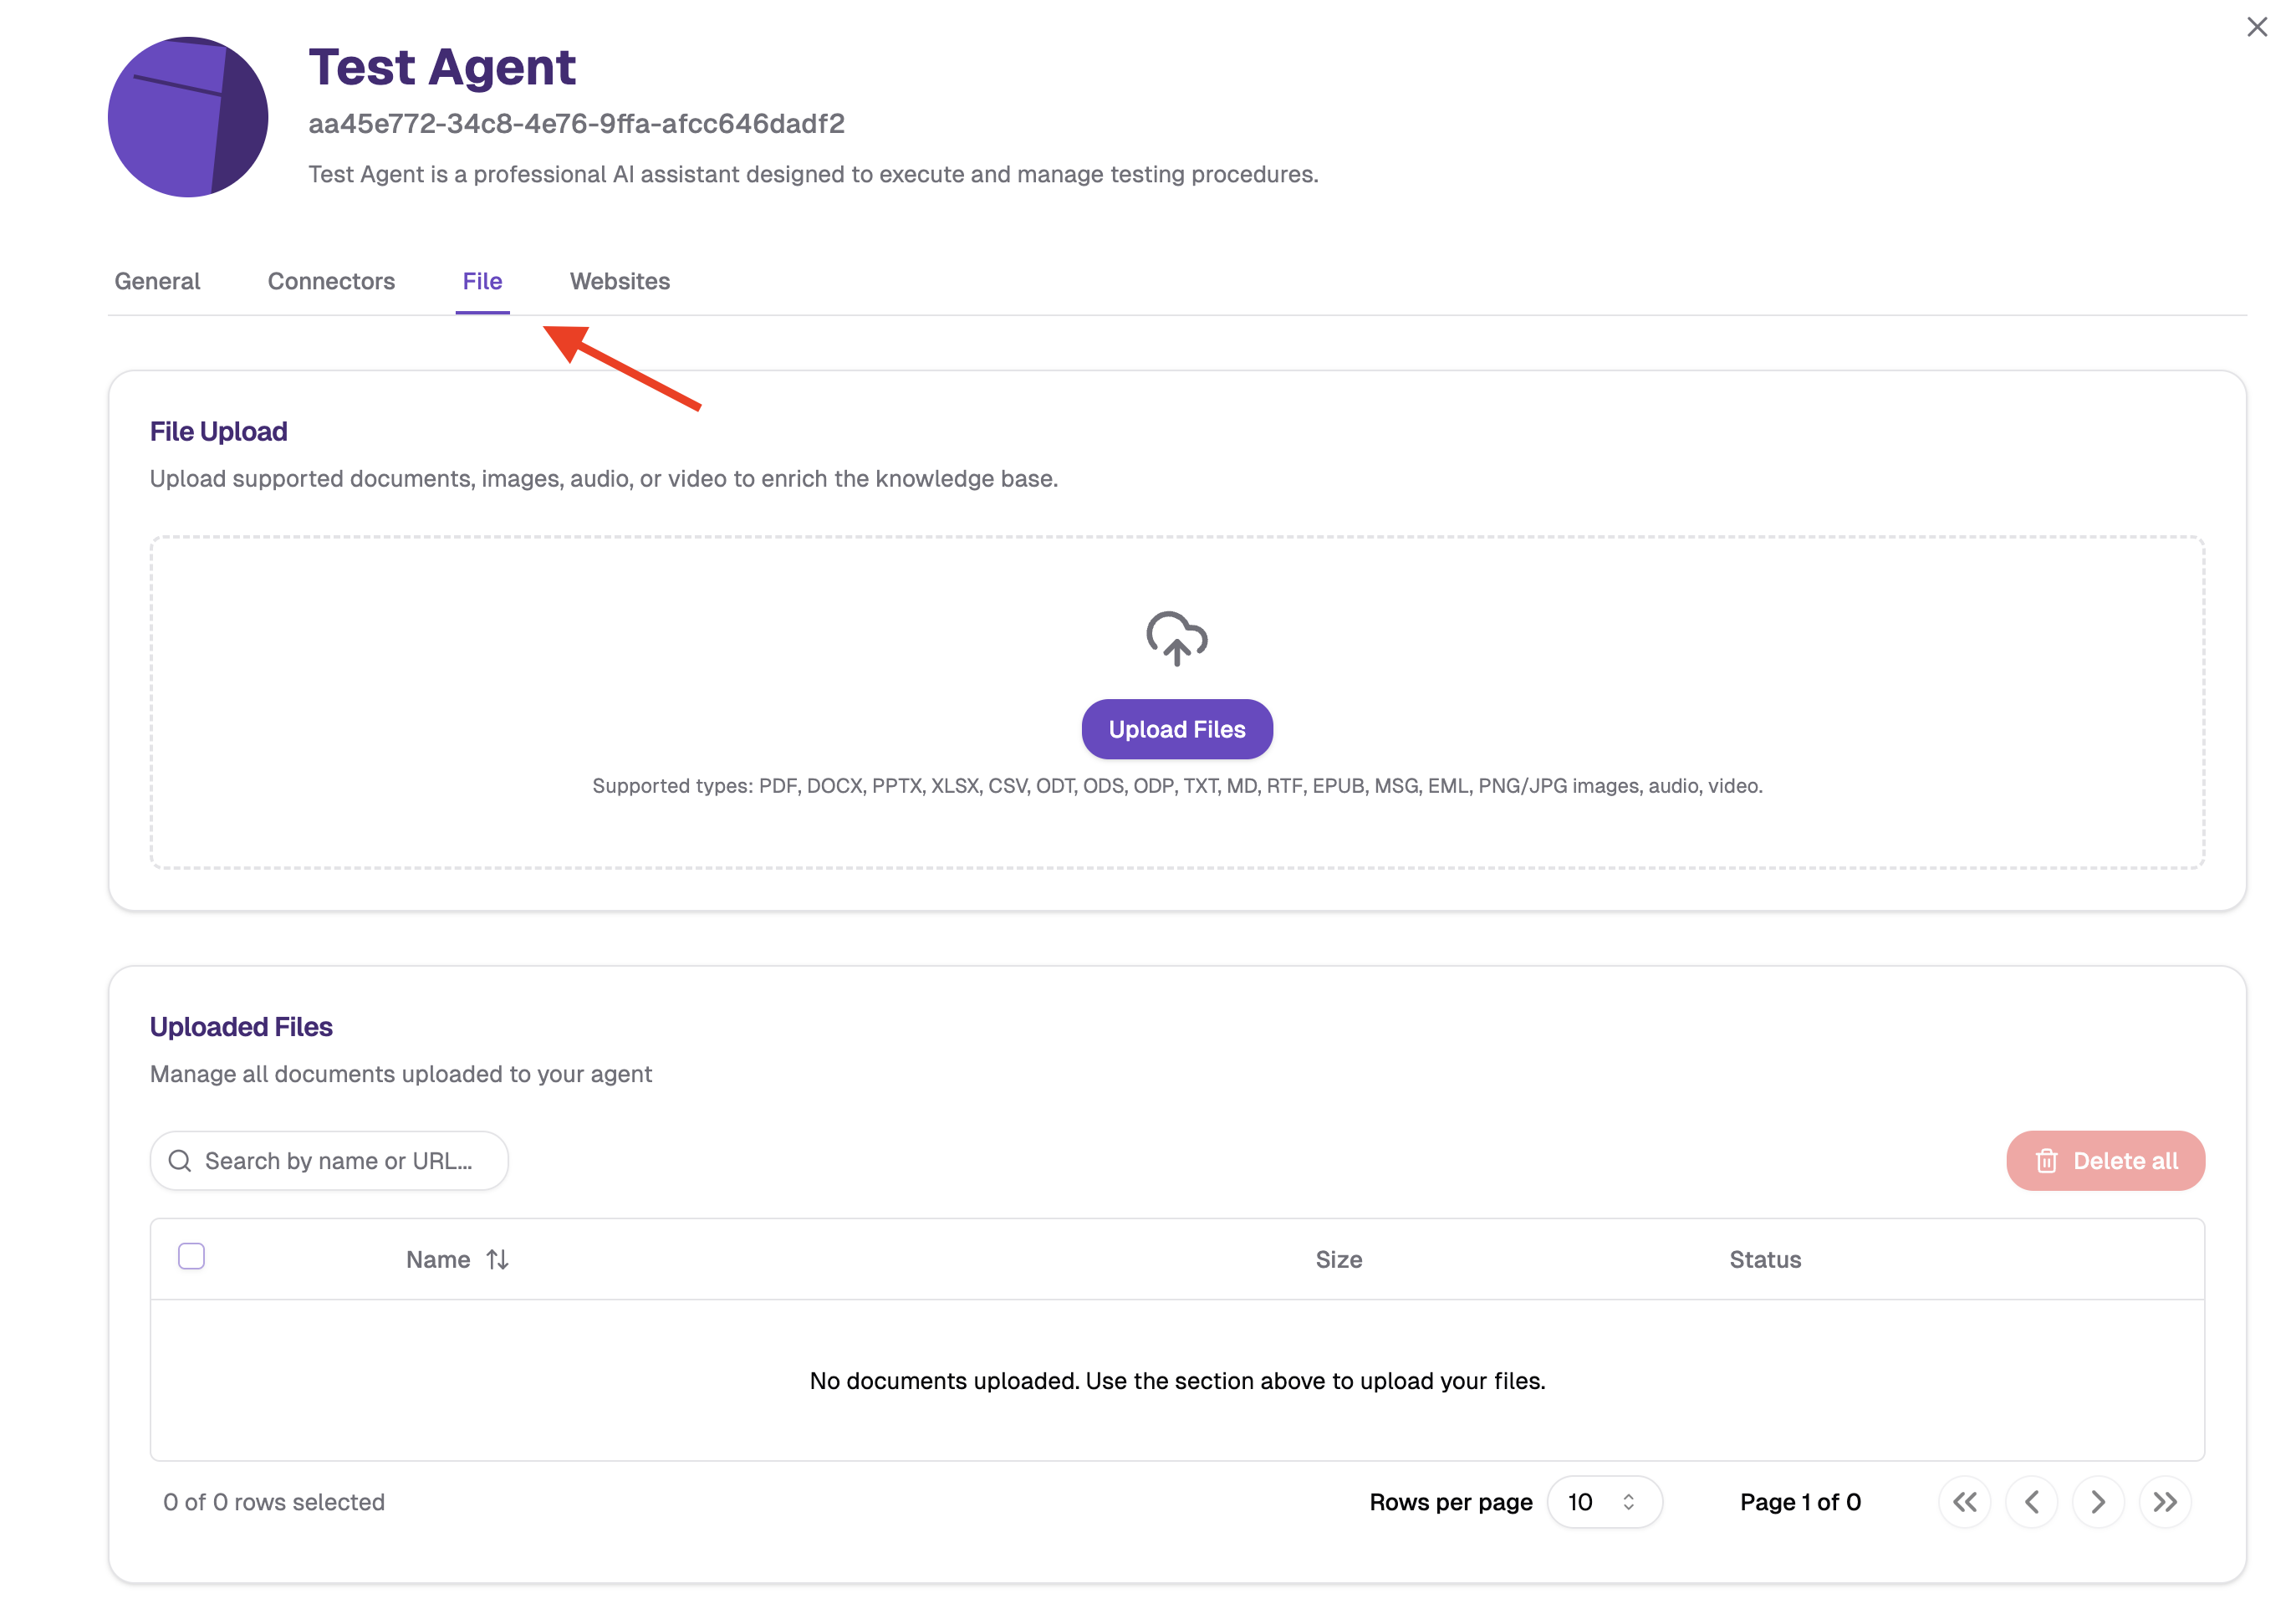
After configuring your agent, you can add static knowledge sources—information that is uploaded once and doesn't change automatically:
File Upload: Upload documents directly to your agent
- Supported formats: PDF, DOCX, XLSX, TXT, PPTX, CSV, and more
- Use for: Company documents, reports, manuals, policies, training materials
Website Integration: Add content from websites
- Manual URL entry for specific pages
- Sitemap crawling to index entire sites
- Document scraping for PDFs and DOCX files
Static sources are not automatically updated. If source content changes, you'll need to manually re-upload or re-scrape to get the latest information.
→ For detailed instructions on uploading files and integrating websites, see Adding Files and Websites
Step 3: Enterprise Connectors
Connect your agent to live enterprise data sources for real-time, automatically updated information:
Database Connections: Query organizational databases using natural language
- Access structured data from PostgreSQL, MySQL, SQL Server, MariaDB, Generic SQL (JDBC)
- Get real-time insights without writing SQL
- Automatically synced based on administrator-configured schedules
Knowledge Base Connectors: Access enterprise documentation systems
- Connect to Google Drive, SharePoint, S3-compatible storage, Samba shares
- Search across organizational repositories
- Automatically updated content
MCP Server Integration: Integrate with external tools and systems
- Access business systems (CRM, project management)
- Perform actions and retrieve data in real-time
- Connect to any external platform with APIs
Enterprise connectors are configured by your organization's administrators. You can browse and connect to available data sources that have been set up for your organization.
→ For detailed information on connecting enterprise data, see Connectors
Next Steps
Now that you understand the overview, dive into the details:
- Agent Configuration: Learn how to define effective job profiles, set capabilities, and optimize agent behavior
- Adding Files and Websites: Discover how to upload documents and integrate web content
- Connectors: Connect to enterprise databases, knowledge bases, and external systems
- Agent Examples: Explore pre-configured templates for common use cases
- Sharing Agents: Collaborate with team members
For organization-wide agent management and administrative configuration, see the Admin Agent Management Documentation.