Voice Generator
The Voice Generator lets you convert text to speech using standard platform voices or your own cloned voice. You can upload personal voice samples, generate transcriptions to activate voice cloning, and review all audio you have generated.
Accessing the Voice Generator
Click your profile name in the bottom-left corner to open the user menu, then select Voice Generator.
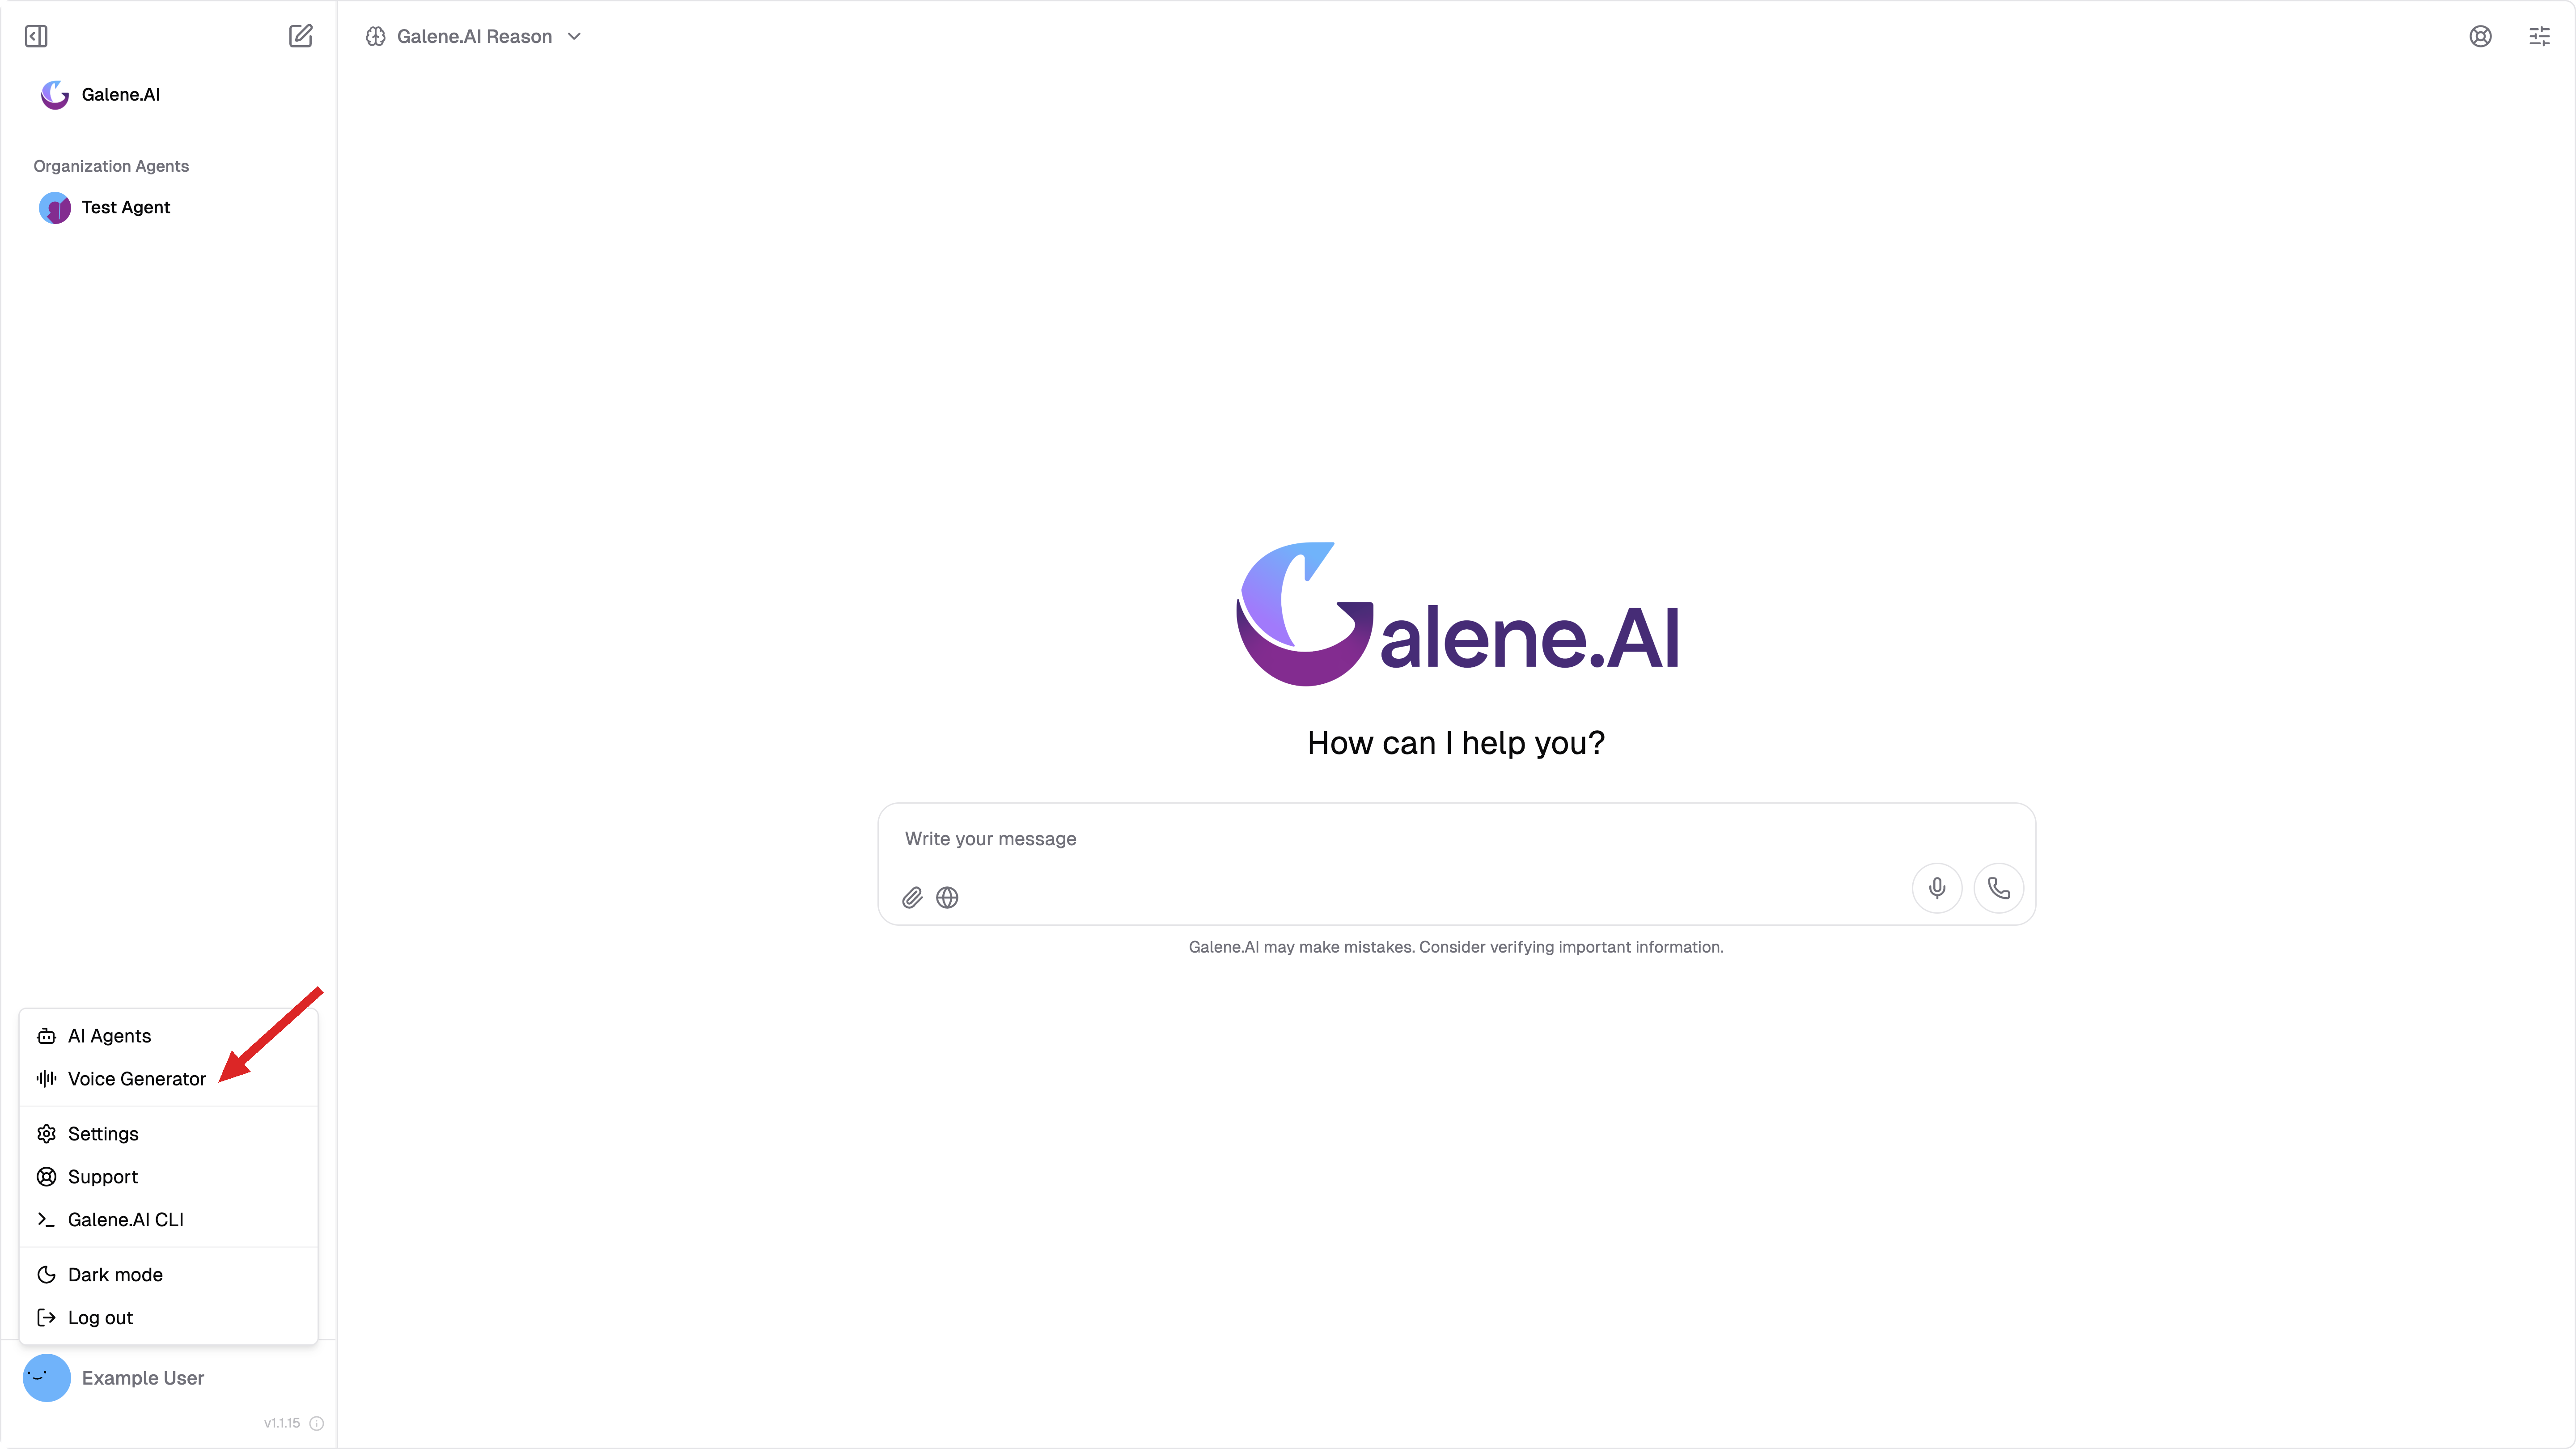
The Voice Generator opens as an overlay with three tabs: Voice Generator, Voice Samples, and Voice Transcriptions.
Voice Generator Tab
The Voice Generator tab is where you produce speech from text.
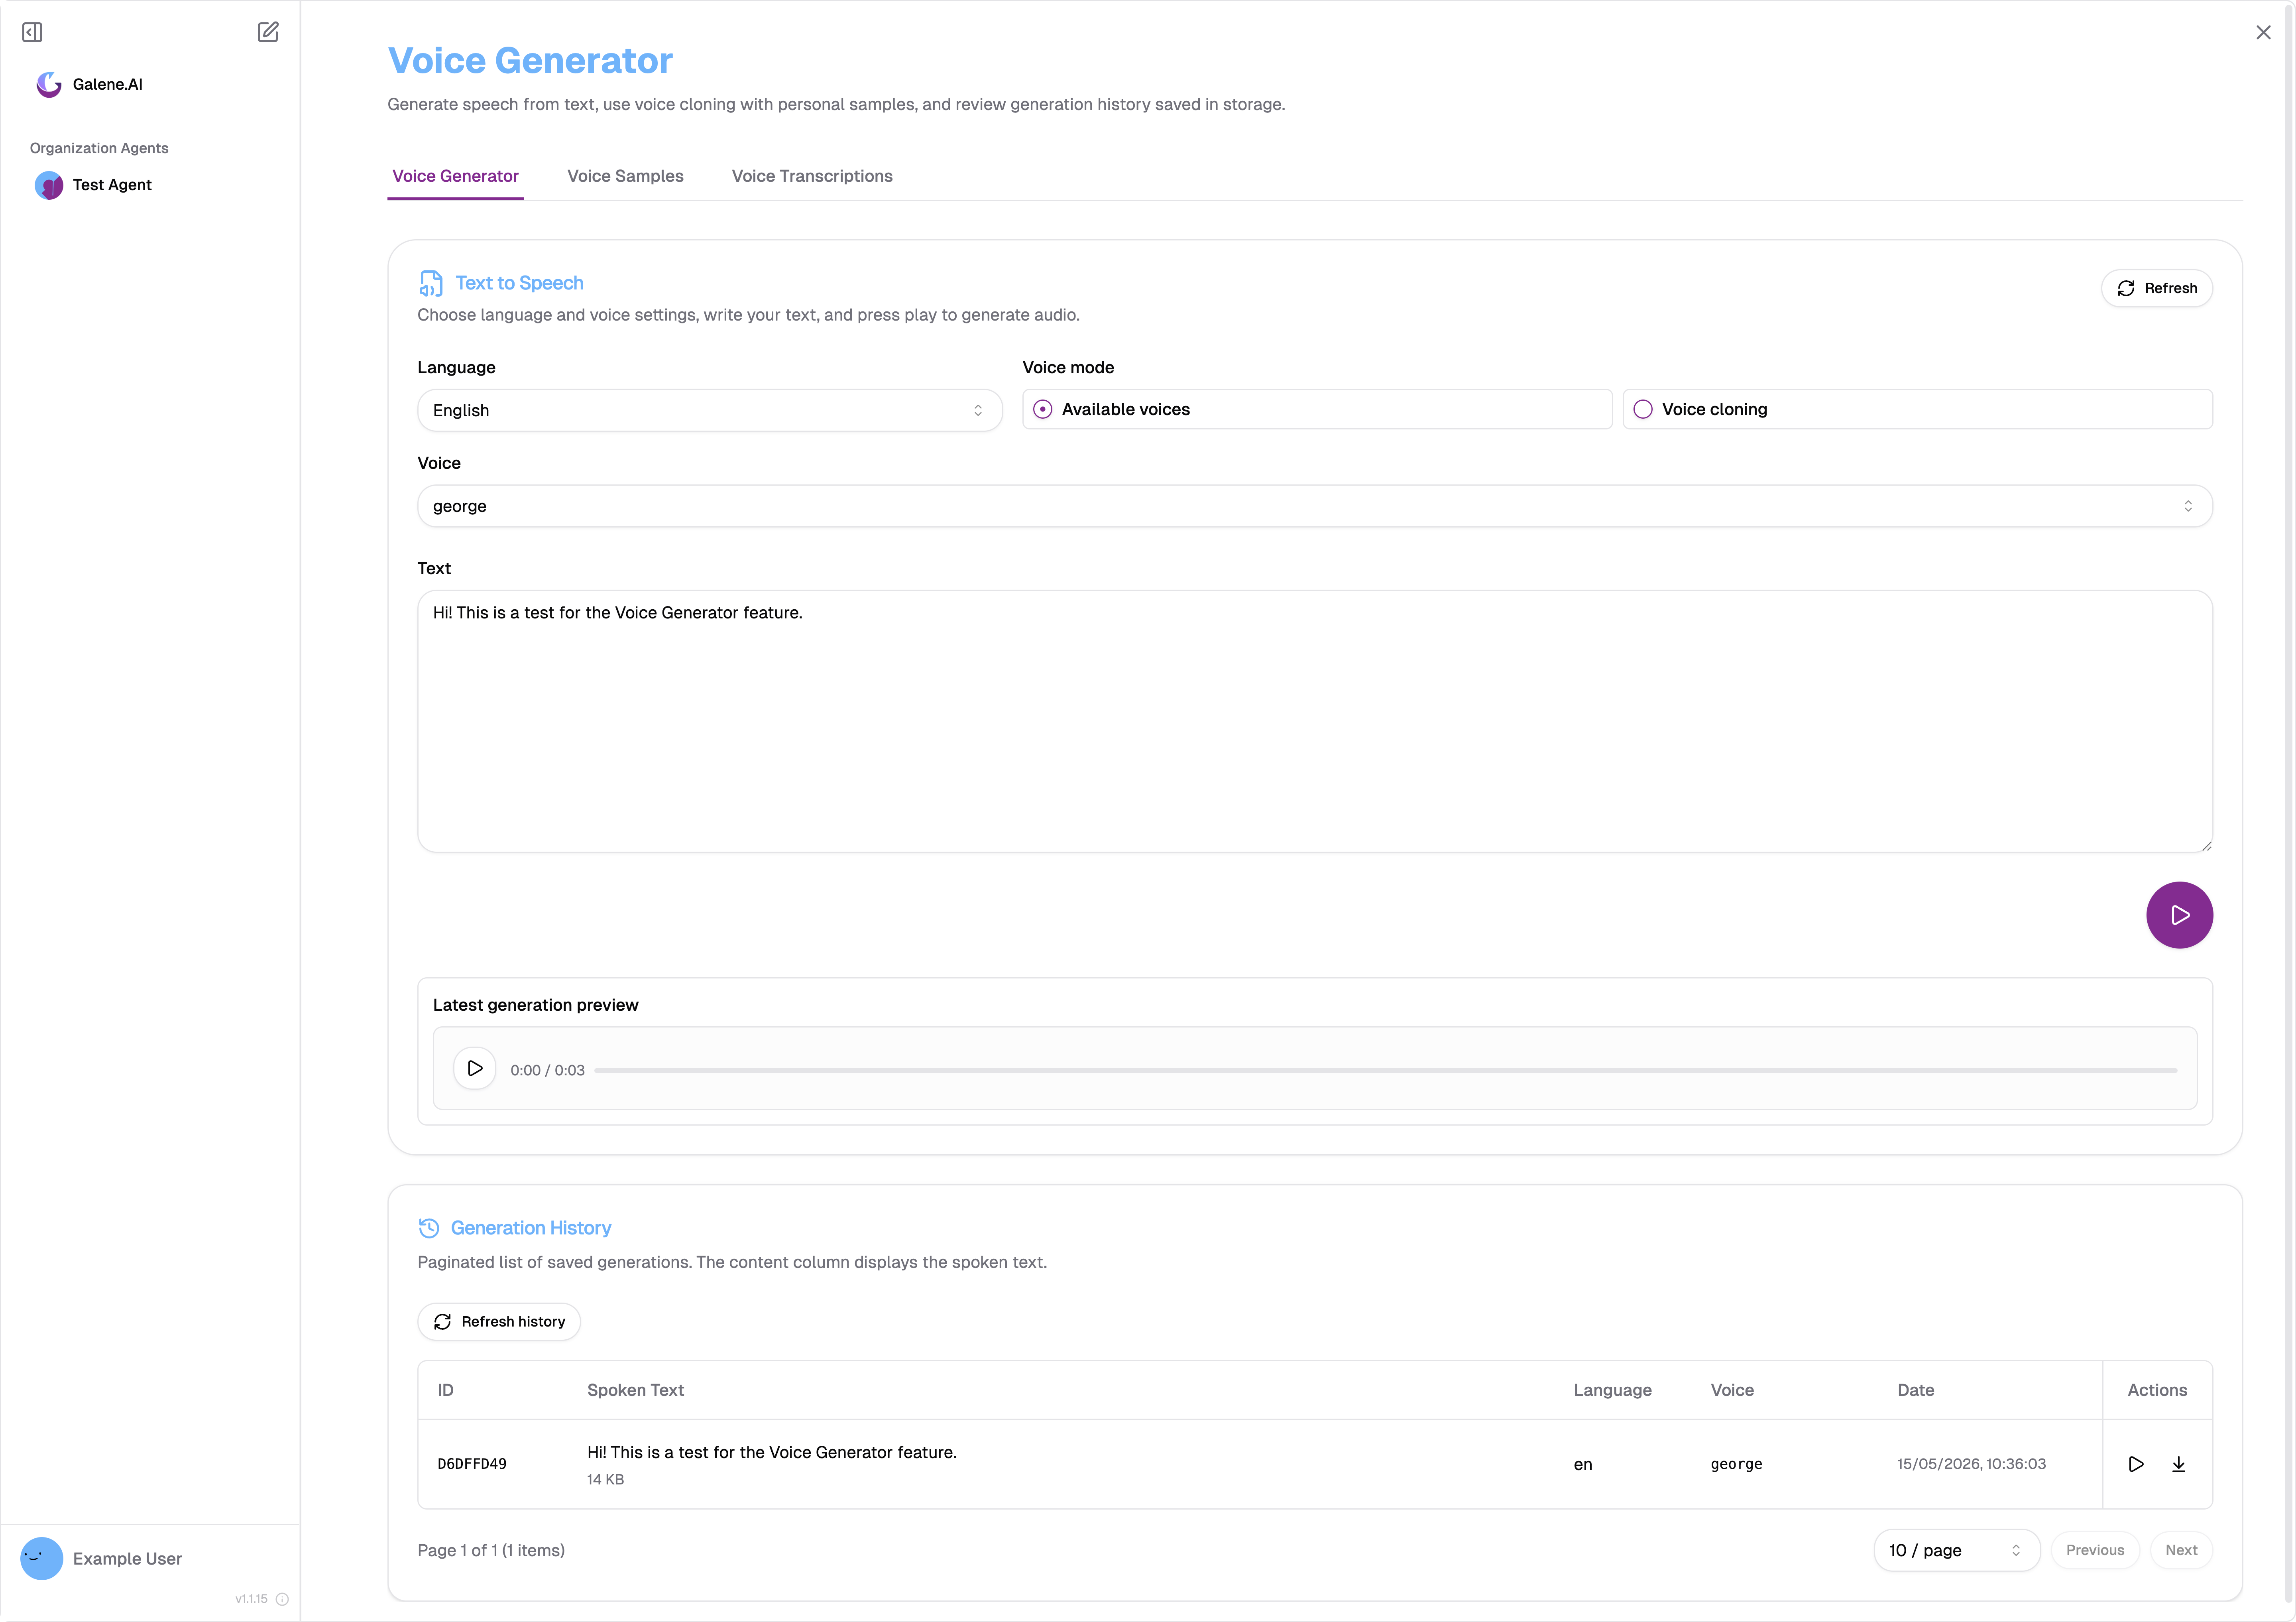
Start by choosing a Language and a Voice mode:
- Available Voices
- Voice Cloning
Select Available voices to pick from the standard TTS voices provided by the platform. Choose a voice from the Voice dropdown, type your text, and click Play to generate the audio.
Select Voice cloning to speak with your own voice. Only samples that have a completed transcription appear in the Voice dropdown — see Voice Samples below if you haven't set one up yet.
Type the text you want spoken in the Text area, then click the Play button to generate. The result plays immediately in the Latest generation preview player below the text area.
Generation History
Every generation is saved automatically in the Generation History table at the bottom of the tab. Each row shows the spoken text, language, voice used, and the date it was created. Use the Play and Download actions on each row to replay or save past generations. Click Refresh history to load the latest entries.
Voice Samples Tab
The Voice Samples tab is where you register your own voice so it can be used for cloning.
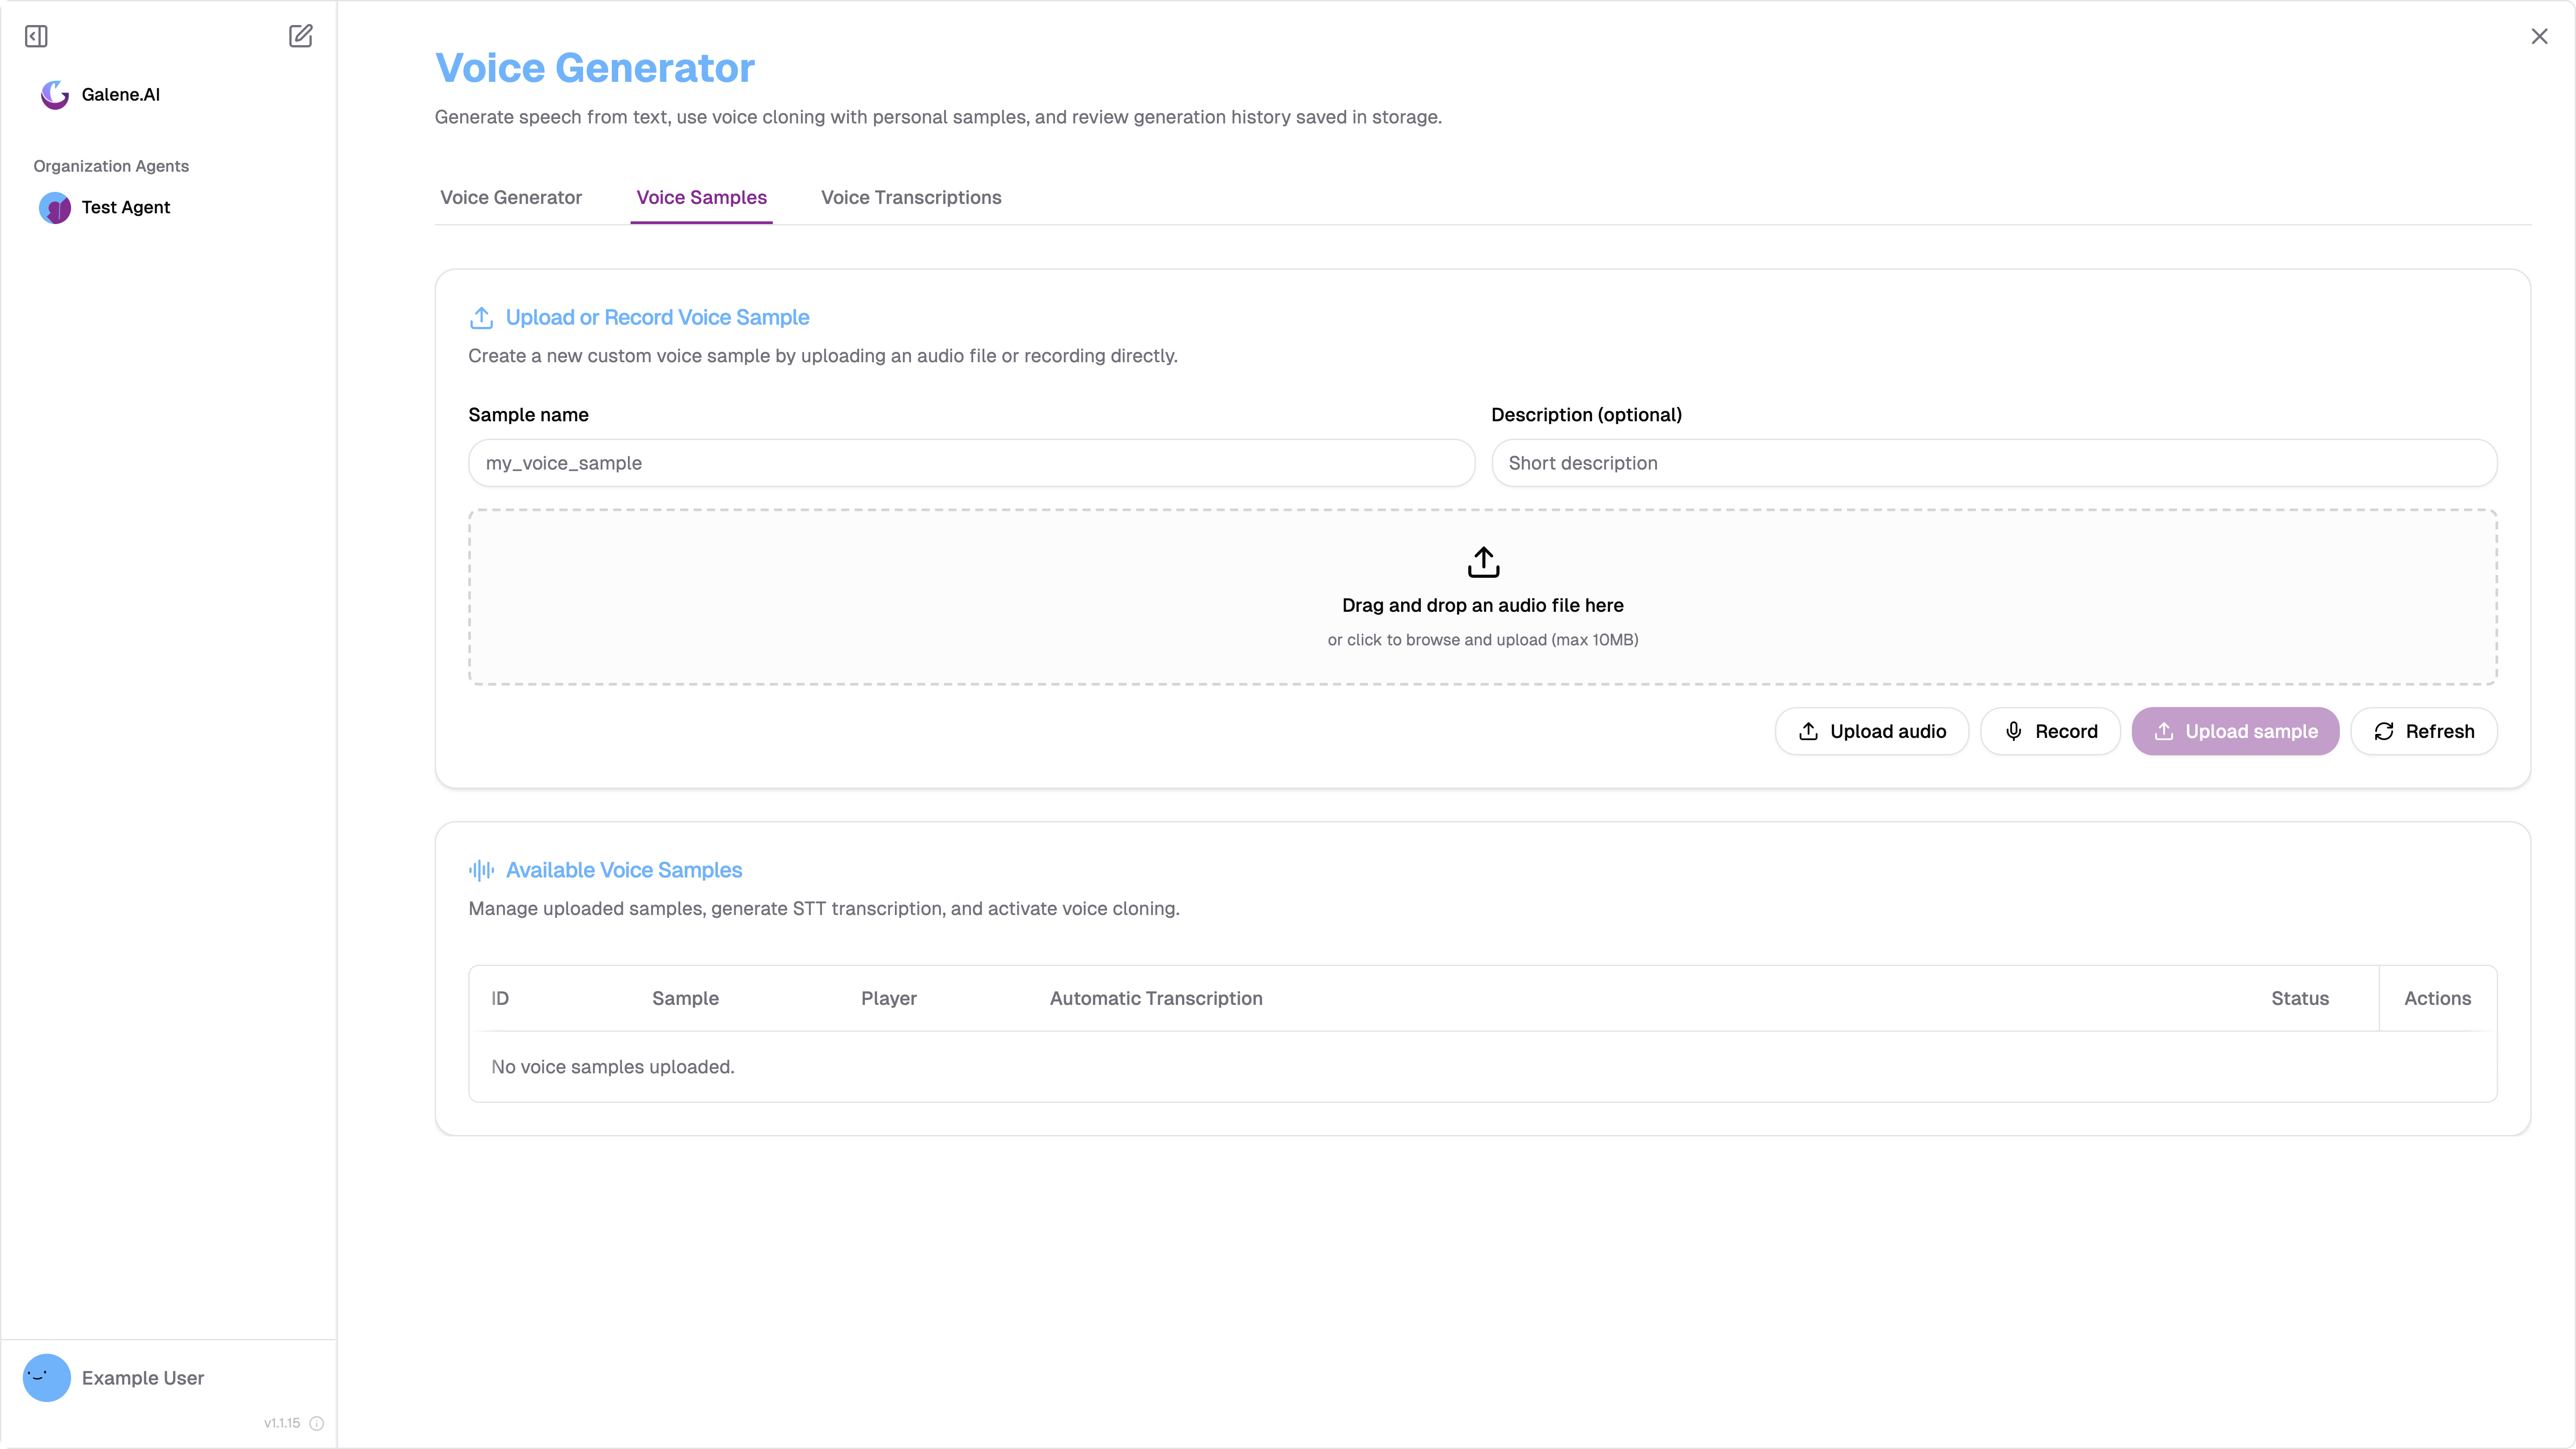
Uploading a Voice Sample
Upload from file
- Enter a Sample name (alphanumeric characters, dashes, and underscores only)
- Optionally add a Description to help identify the sample later
- Drag and drop an audio file onto the upload zone, or click Browse to select one
- Maximum file size: 10 MB
- Click Upload sample to save
Record directly
- Enter a Sample name and optional Description
- Click the Record button (microphone icon)
- Speak clearly into your microphone
- Click Stop to finish — the recording is automatically uploaded
Recording requires microphone access. Your browser will prompt for permission on first use.
Activating a Sample for Voice Cloning
Uploading an audio file is only the first step. Before the sample can be used for cloning, the platform needs a text transcription of it to accurately reproduce your voice characteristics.
Once your sample appears in the Available Voice Samples table, click the Generate with STT action (sparkles icon) to transcribe it automatically. When the status changes to Ready, the sample is available in the Voice Generator tab under the Voice cloning dropdown.
To delete a sample, click the Delete action and confirm. The sample and its transcription are permanently removed and the voice will no longer appear in the cloning dropdown.
Voice Transcriptions Tab
After generating a sample — say, the "Hi, this is a test for the voice generator feature" recording created in the Voice Generator tab — you can review and manage its transcription here.
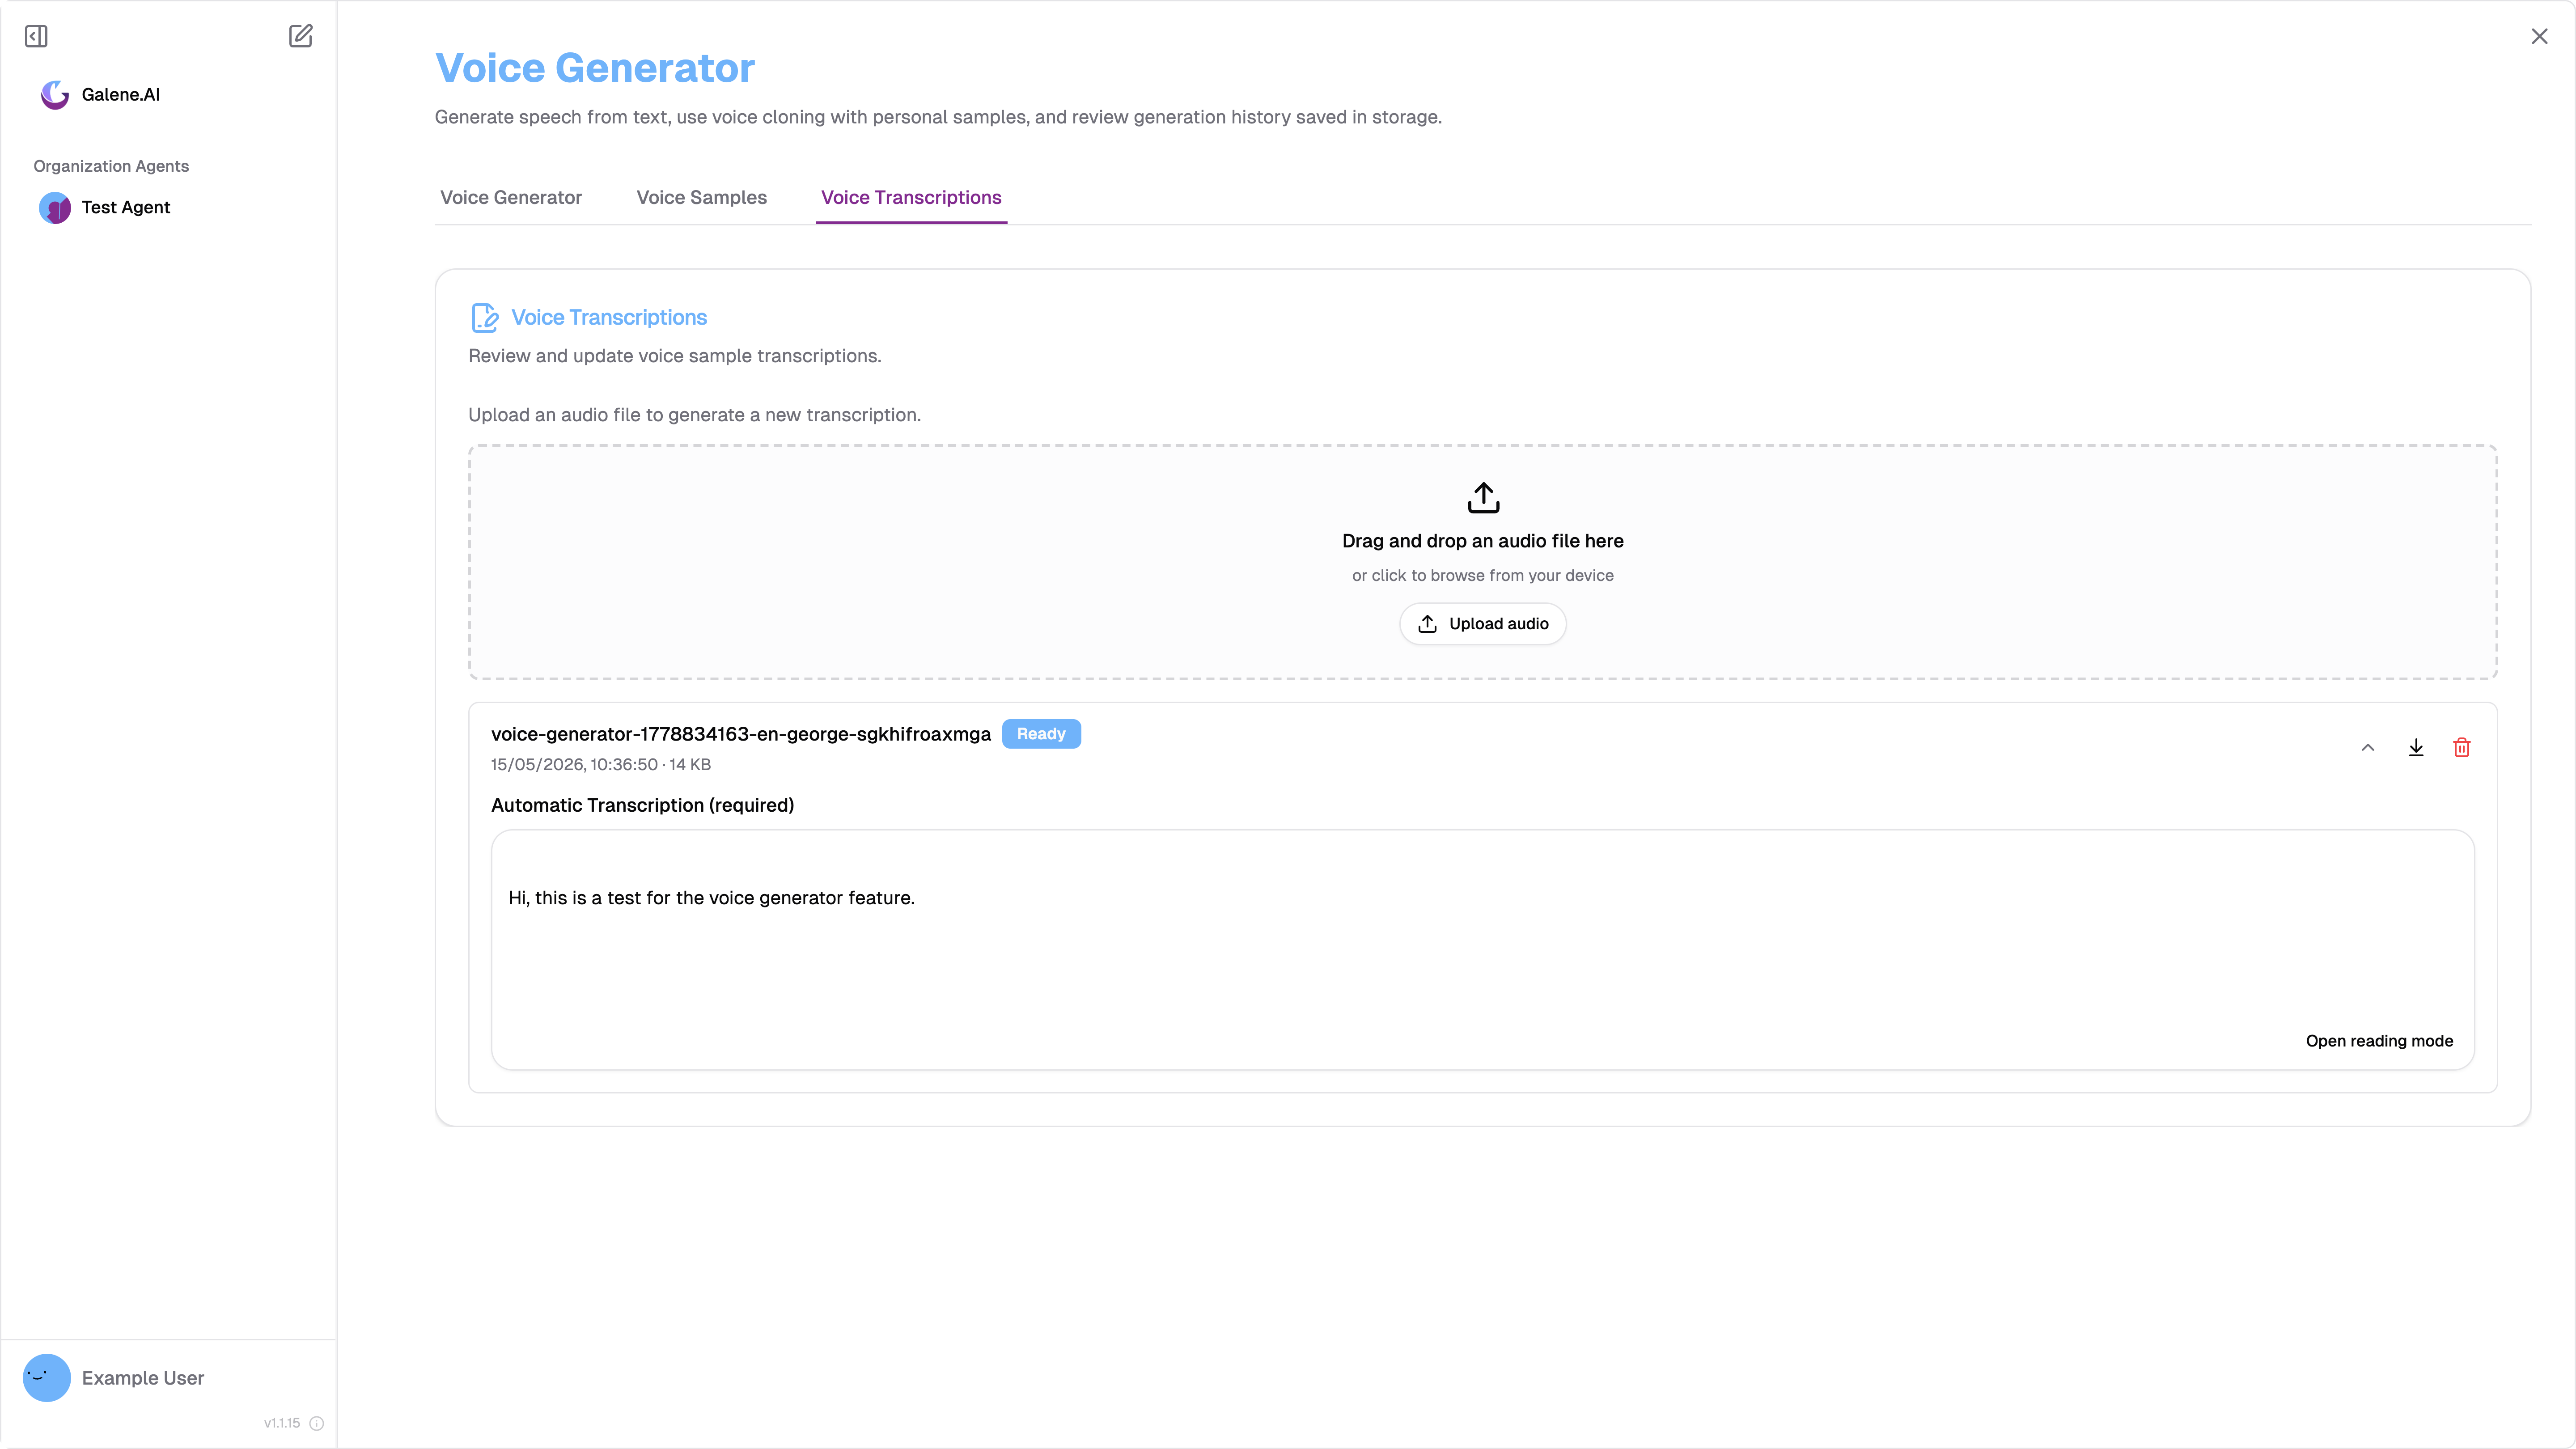
The upload zone at the top lets you submit a new audio file for transcription directly from this tab, without going through Voice Samples. Below it, each existing transcription appears as a card showing the file name, creation date, size, and Ready status once processing is complete.
Expand a card to read the Automatic Transcription text. If the STT result contains errors you can edit it directly in the text area, then save your corrections. Use the Download icon to save the transcription as a text file, or the Delete icon to remove the entry entirely.
For longer transcriptions, click Open reading mode at the bottom of the text area for a distraction-free view.
Supported Languages
| Language | Code |
|---|---|
| Italian | IT |
| English | EN |
| French | FR |
| German | DE |
| Spanish | ES |
| Portuguese | PT |
The Voice Generator is only visible if voice capabilities have been enabled for your organization. If you don't see it in the user menu, contact your administrator to enable Voice Input in Platform Capabilities.
Next Steps
- Agent Audio Settings — Admin guide for configuring organization-wide TTS voice overrides
- Chat Usage — Learn about voice input options available directly in the chat interface